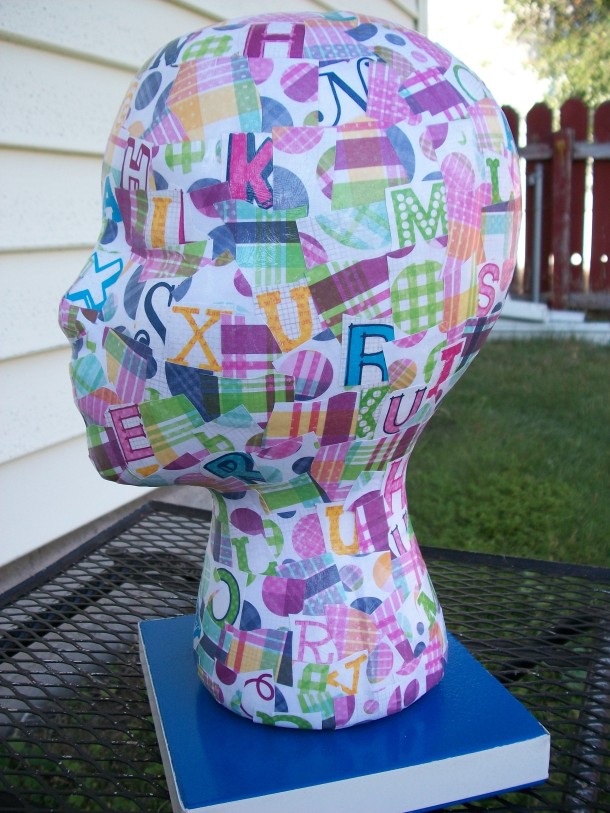
I’ve been home on vacation from college for a little over a week now, & I’ve been spending a lot of that time doing all sorts of crafty projects. The first one I decided to undertake was decoupaging my ugly styrofoam head. I’m not sure why it took me so long to realize I could solve the problem of it’s ugliness with a little Mod Podge & paper, but once I got the idea in my head I immediately did a little shopping for scrapbook paper. I got 3 different patterns in similar colors – a plaid, a polkadot, & one with various letters all over it. I chose to cut the pieces up using scissors [because I wanted to cut out the letters individually], but you could just as well rip up the pieces for a less perfect look.
Decoupaging is fairly simple, which is why I love it so much. I actually can’t believe I haven’t done more of it in the past – it’s that easy & gives such great results! I poured my mod podge into a small container & used the foam brush to spread a little of it onto the foam head. I did one piece of paper at a time, layering it alternately between the three designs, & then spreading a little more mod podge on top of it. I used my finger to smooth it out & keep it from getting gloppy. Because of my perfectionism though, this project was slow moving & took me a few days, but if you’re determined [& not as picky] you could absolutely complete it in a matter of hours.
The face is the hardest part because you need to have smaller pieces since the larger ones wrinkle & get ugly easily, so I started there, working my way from the seam on top of the head down the front. After completing that, the back of the head is a piece of cake. It gets difficult again around the neck & the base. You want to continue decoupaging around the bottom a little so that it looks smooth & finished. I also tried to make sure my letters were going the same direction throughout.
I thought I had more pictures of the process but I guess not. It’s pretty straight forward though, & if you have questions just leave a comment & I’ll do my best to help. You can also do a Google search if you’re impatient, as there are lots of similar tutorials around the web.
My dad ended up cutting & painting a base for me with part of a broomstick handle that fits inside the head, but if I hadn’t had his help I would have simply purchased a round piece of wood from Michaels [about $4 or $5] & found a way to glue my head onto it. They come unfinished, so you can paint it, varnish it, or leave it as is. A nice base really finishes your styrofoam head & can help it double as a piece of artwork as much as a model for your work.
I hope this helped anyone looking for instructions on decoupaging a mannequin head [or anything else, for that matter]. This is my first semi-tutorial post, so feedback is welcomed.
Thanks for reading & happy crafting!

