
It’s hard to believe that my blog post about my experience with the sharpie mug craze is over two years old now and has gained an insane amount of popularity. I still to this day get hundreds of views from that post and see comments from fellow crafters looking for advice on their creations. I am, of course, no expert on the topic, but I did want my first post to be a sort of “did it work or not” post for others to use as a reference, and I’m happy to say that it has done just that.
Thanks to all of that, this year when I decided to give a sharpie mug as a gift, I thought I would document the process. I was especially excited because I had to get creative after being unable to find a good white coffee mug, and chose to use a black one with a metallic Sharpie oil-based paint pen instead. This has surely been done by others, but I have never seen it myself, and after so many of my readers mentioned troubles with colored pens and the like, I was curious about how this would work out!


My best friend and I are currently living in different states and I have always loved the state art that shows two places being connected by a dashed line. I also really liked the quote “together forever, never apart, maybe in distance but never at heart.” So, I found some state stencils online and printed out a few different sizes on heavyweight cardstock, chose the one that worked best, and used double sided tape to stick it to my mug. I then traced around the states and removed the stencils – easy as that! There was some bleeding of the paint under the stencils, as you can see in the pictures, so I used a Q-tip dipped in alcohol (a great trick suggested by a reader!) to clean up the edges. Then I freehanded the line, the hearts, and the quote.
I let it sit overnight before sticking it in the oven. I placed it in the cold oven, turned it up to 350 degrees F, and timed it for 30 minutes. Then I let it cool in the oven overnight.
I really like the way it turned out After letting it sit for a few days after it was done, I tried to scratch at the Sharpie, and it seemed pretty solid. I should also point out that I had no discoloration or fading after baking my mug. I placed the states and the quote quite close to the lip of the mug because I intended this mug to be for decoration only, perhaps on a desk to hold pens (my friend is a teacher), and I made sure to let her know when I gave it to her.
While we’re on the subject of Christmas gifts I gave this year, my friends & I did all homemade gifts this year since I’m a poor college student and was trying to survive the holiday on the little that I had. The second gift I made this year was Instagram tile magnets, and they were so fun, so easy, and so inexpensive!
 I decided to do this after coming across this blog post on Pinterest. I already had some Mod Podge and photo paper lying around that I had picked up from the Dollar Tree, so I ran out the next day and got the sheet of tiles (36 of them for around $2-$3) and the roll of magnet tape. I saved Instagram pictures from my friend’s profile (which is really tricky – the only way I found to do it was taking a screenshot and cropping) and used Word to create a sheet of them. I printed them at home on photo paper using my own printer, cut them out, and got to work. I used a flat watercolor paint brush to lay down some Mod Podge on the tile before carefully placing the paper and then painting on another layer of Mod Podge. Streaks and bubbles are no issue, since they generally disappear as the Mod Podge dries clear. After letting them dry for several days, I cut small pieces of magnet tape and stuck two pieces firmly on the back of each magnet.

These six are the first ones I did using my own pictures because I wanted to test out the process, and I think they turned out so beautifully! After making six for myself and six to give to my friend as part of her Christmas gift, I have 24 tiles leftover – so I’m looking forward to making some more of these for my parents and other family members and friends!
Finally, I did some crocheting over break since crochet hooks are the only needlecraft tool I could bring home with me on the plane. I made a beanie as a gift for my friends fiance, because he wore the last one I made him until it fell entirely apart.
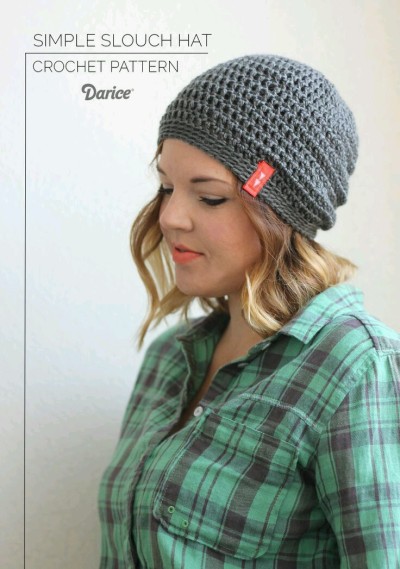
I used this pattern that I found – where else – on Pinterest. Clicking on the picture will also take you directly to the pattern. I was looking high and low for something that looked really nice but wasn’t too “girly”. This one fit the bill perfectly and was so easy to make. I used Red Heart Soft yarn, which is a new favorite of mine, and did it in a crimson color. I unfortunately didn’t take any pictures of that hat being made or completed, but I made another hat using the same pattern and got a few pictures of me working on that.

 I got this yarn from Hobby Lobby a few years back and really only purchased it because it was named “Danielle”. The yarn is SO pretty and made a gorgeous hat. I made it for myself, but ended up giving it away to my 17 year old neighbor on Christmas Eve because it looked like something she would be able to rock – and I was right, she looked so great in it!
I also made a couple of crochet headbands as the final touch for my best friends Christmas gift. I hadn’t intended initially to give her those because I have already given most of my friend crochet headbands as gifts, but right before the holidays I saw some pictures of her wearing the last headband I made her and it was clearly falling apart and needed to be replaced. Luckily, those are easy to whip up, and this time I made her two so she doesn’t have to wear one to death!
Hope you all enjoyed this post! I know they are getting farther and farther apart these days, but I unfortunately can’t craft or blog regularly while also being a full time grad student, so I just do it when I can, and I think that makes them more sincere and put together anyways. :] Thanks so much for reading and as always, happy crafting!